The quick answer
To record a PowerPoint presentation with your voice on a Mac, open the deck in PowerPoint, select Record, choose From Beginning or From Current Slide, turn on your microphone, present the slides, then choose Export to Video. This keeps narration and slide timings attached to the presentation. Microsoft's recording instructions show the current controls; their names can vary with your PowerPoint version.
If your talk includes a live software demo, browser, or another app, record the screen instead. Press Shift–Command–5 for macOS Screenshot, choose a microphone in Options, and record the slide show. For a video you want to edit with camera layout, captions, and tighter pacing, record the presentation in Creavit Studio and refine it on the timeline.
These three methods produce different source material. Pick one before you rehearse:
| What you need | Best starting point | What you can revise afterward |
| Slides, spoken narration, and per-slide retakes | PowerPoint's Record feature | Re-record a slide and change its timing inside the deck |
| A quick video of slides or a live desktop demonstration | macOS Screenshot | Trim the finished screen video in another app |
| Slides plus camera, other windows, and a polished edited video | Creavit Studio | Edit the recording, layout, pauses, text, and export |
Before you record: prepare the deck, sound, and screen
Write one sentence explaining the purpose of each slide. Rehearse the transition into the next idea rather than reading every bullet aloud. If a chart needs 20 seconds of explanation, give it that time; an equal duration for every slide usually feels rushed in one place and slow in another.
Do a 15-second test recording and play it back through headphones. Check that the selected microphone is the one you expect, your voice is clear, and the slide is readable at the size your audience will actually watch. Quiet rooms and a microphone close to your mouth matter more than a high video resolution. Close message apps, hide private tabs, and make the cursor easy to find if you will demonstrate software.
Decide whether you need your voice, sound made by the presentation or another app, or both. A microphone records narration; it does not automatically capture audio playing through the Mac's speakers. This distinction explains many silent exports.
Method 1: Record narration inside PowerPoint for Mac
Use PowerPoint's own recorder when the slides are the entire presentation and you want to fix one slide without repeating the whole talk.
- Open the finished deck and save a working copy.
- In the Record tab, choose From Beginning or From Current Slide. In some versions, the entry point is a Record button near the top right.
- Select the microphone and, if wanted, the camera in PowerPoint's recording controls. Make a short test and review it.
- Record the narration while advancing through slides. Let transitions finish before speaking; Microsoft notes that narration is not recorded during slide transitions.
- Replay the result. Re-record a slide whose audio or timing needs work.
- Choose Record → Export to Video, or File → Export in versions that present export there. Select MP4, choose the quality, and enable Use Recorded Timings and Narrations when offered.
PowerPoint stores the recording with the slides. Save the deck as well as the exported MP4 so you can revise a slide later. Microsoft's Mac export guide says recorded Slide Show narration is included in the video, while other embedded media files may not play in the export. Preview the actual MP4 before sending it, especially if your slides contain video, sound, or complex animation.
When the PowerPoint export is silent
First play the deck inside PowerPoint. If there is no voice there, check the microphone selection and record that slide again. If narration plays in the deck but not in the MP4, export again with Use Recorded Timings and Narrations enabled. If the missing sound comes from an embedded video or another media file, check the exported file separately: Microsoft's Mac documentation calls out this limitation. A full screen recording may be a better route when the live media is essential.
Method 2: Screen record the slide show with macOS Screenshot
Use the built-in Screenshot tool when you need a straightforward screen video and do not need a separate editing project. It records the presentation as it appears, so it can also capture a demonstration outside PowerPoint.
- Put the deck in Slide Show mode and position the display or selected recording area.
- Press Shift–Command–5.
- Choose Record Entire Screen or Record Selected Portion. The exact toolbar options depend on your macOS version.
- Open Options and choose your microphone for narration. Set the save location and a short timer if useful.
- Start recording, give yourself a quiet second, present the slides, and stop from the menu bar or with Control–Command–Escape.
- Open the saved video and check the first and last slide, voice level, and any sound played by the deck.
These controls follow Apple's Mac screen recording guide. On macOS versions that offer Include System Audio, enable it when you need sounds played by the Mac. Availability varies by version. For the difference between microphone and system audio, see our Mac system audio recording guide.
Screenshot records pixels, not editable slide objects. If you change a chart after recording, you will need a new take or a video edit. Keep the source deck and the screen recording together.
Method 3: Record and edit a presentation in Creavit Studio
Choose this workflow when the final piece should combine slides with a live app walkthrough, an optional presenter camera, captions, or a more deliberate layout. It is also useful for a course lesson or product explanation that needs several cuts.
- Open the presentation and choose the display or window to capture in Creavit Studio. Run a test to confirm that the slideshow or presenter view is the source you intend to show.
- Enable the microphone for narration. Enable system audio only when you need sound from PowerPoint or another app. Add a camera source if seeing the presenter helps the lesson.
- Record one section at a time or leave a short pause between topics. Speak naturally; you can remove a false start later.
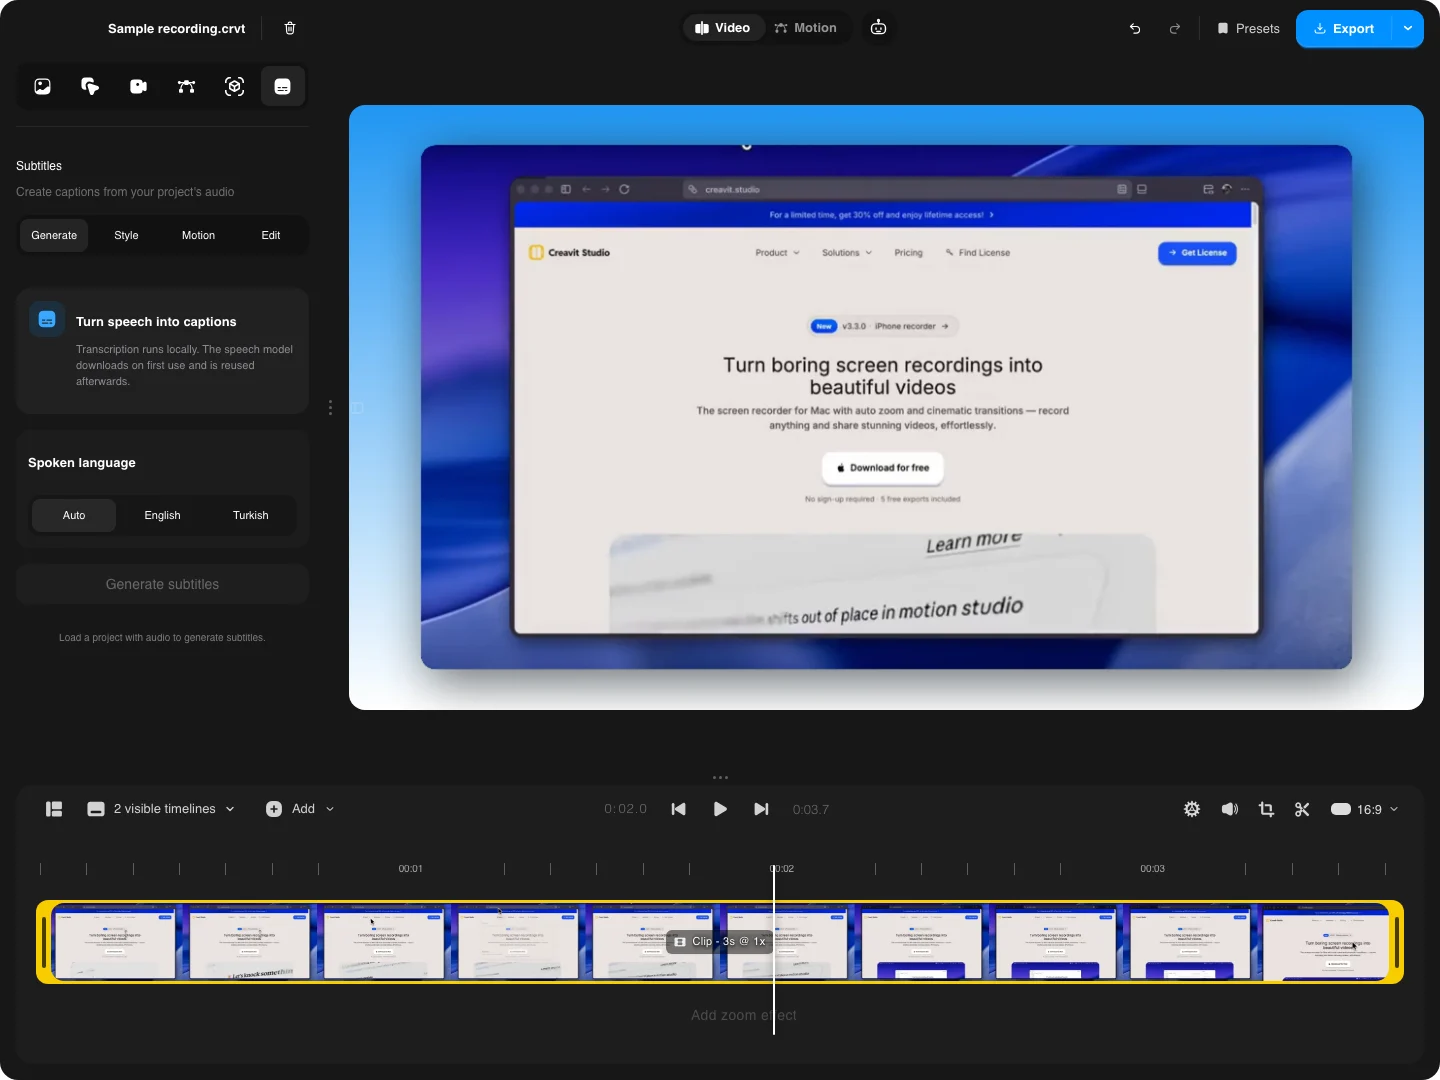
- In the editor, trim the beginning and end, review pauses, and keep enough time for viewers to read important slides. Position the camera away from charts and text.
- Add captions or short text labels where they make the explanation clearer. Export the finished video, then watch the exported file with sound on.
Creavit Studio records the actual screen and audio sources, so slide changes remain in the video you capture. It does not turn a PowerPoint deck into editable slide objects. The editor works on your recording and the visual layers you add around it. See the Mac tutorial recording tools for the broader workflow, or download Creavit Studio to make a short test recording.
Edit for the person watching, not the person presenting
An audience cannot ask you to go back a slide. Leave a beat after a dense visual, and remove only pauses that add no meaning. When you cut a section, check both the voice and the picture at the join. Our silence removal guide explains how to review these cuts without deleting useful reading time. A camera overlay should support the explanation; it should not cover the result you are asking someone to inspect. For layout options, see recording a screen with a webcam on Mac.
Export settings and a final quality check
An MP4 is a practical delivery file for most course platforms, video hosts, and direct sharing. Choose the dimensions for the destination and check the export rather than assuming a higher resolution always means clearer slides. Small text can still be hard to read when a whole desktop is squeezed into a phone-sized player. If you need more detail, make the slide content larger or record only the relevant window or portion of the screen. Our 4K recording guide covers capture resolution in more depth.
Before publishing, watch the exported file, not just the editor preview. Confirm that the first word is audible, slide changes appear at the right time, embedded media behaves as expected, captions match the narration, and no private notifications or notes are visible. Send a link or file to yourself and play it once at the size your audience will use.
Common questions
Can I record PowerPoint with my voice without buying another app?
Yes. PowerPoint for Mac has a presentation recorder, and macOS Screenshot can record the slide show with a microphone. PowerPoint's recorder is the better choice when you want slide-by-slide retakes; Screenshot is useful when you also need to show other on-screen activity.
Why can I hear myself but not a video embedded in my slide?
Microphone audio and app audio are different sources. PowerPoint's Mac video export has documented limitations for embedded media. If the video must play exactly as presented, test a screen recording with system audio enabled, then inspect the result before relying on it.
Can I include my face in the presentation video?
PowerPoint's recording controls can include a camera on supported versions. A screen recorder with a camera source is another route when you want to move or resize the presenter frame while editing. Keep the camera small enough that the slide remains readable.
Should I record one long take or one slide at a time?
Record slide by slide in PowerPoint when you expect frequent revisions. For a screen-recorded presentation, natural sections are easier to edit and replace than one long take. In either case, rehearse the opening and closing separately: those are the two places where a rushed cut is easiest to notice.
Make a short test before the full presentation
Record one slide with narration and one transition, then export it. That test will tell you whether the microphone, slide timing, camera, and any system sound are in the final file. If the presentation will also show an app or browser, try a short Creavit Studio recording and check how the slides and demonstration work together before you record the whole lesson.