The short answer
To remove silence from a screen recording in Creavit Studio, open Edit Audio for the clip and choose Auto. Review the detected quiet regions, exclude pauses that help the viewer follow the action, and remove the remaining selections. Use Remove when you want a shorter video; muting a range leaves its time in the recording.
Then use the transcript to cut repeated explanations, check the joins on the timeline, and refine the captions. This gives you three different ways to edit the same take: the waveform for sound, the transcript for meaning, and the timeline for the complete visual sequence.
The goal is a recording that is easy to follow. Some quiet moments are useful: the viewer might be reading a dialog, watching a progress bar finish, or locating a control you just named. Silence detection identifies candidates for a cut. You make the editorial decision.
Decide which pauses belong in the video
Watch the recording once before removing anything. Write down the outcome you want someone to understand, then identify where the video stops helping them reach it. A hesitation before a click may be expendable. A pause after a complicated result may be exactly what the explanation needs.
For a product demo, divide pauses into three groups:
- Setup time: finding a window, remembering the next step, or resetting sample data. Usually a candidate for removal.
- Meaningful waiting: a build, upload, or other operation whose behavior matters to the demonstration. Shorten carefully without implying that the product finishes instantly.
- Reading time: a short interval for the viewer to inspect a result or on-screen text. Often worth keeping.
Consider a recording of a report builder. You spend a few seconds searching for the report, select a filter, wait for results, and point out a total. You might cut the search, shorten an uneventful wait, and preserve the pause on the final total. Removing all three would make the video shorter but harder to understand.
Save the editable project before a substantial pass. Keep that source project alongside the final export so you can restore context or update the demonstration when the interface changes.
Find quiet regions with Edit Audio
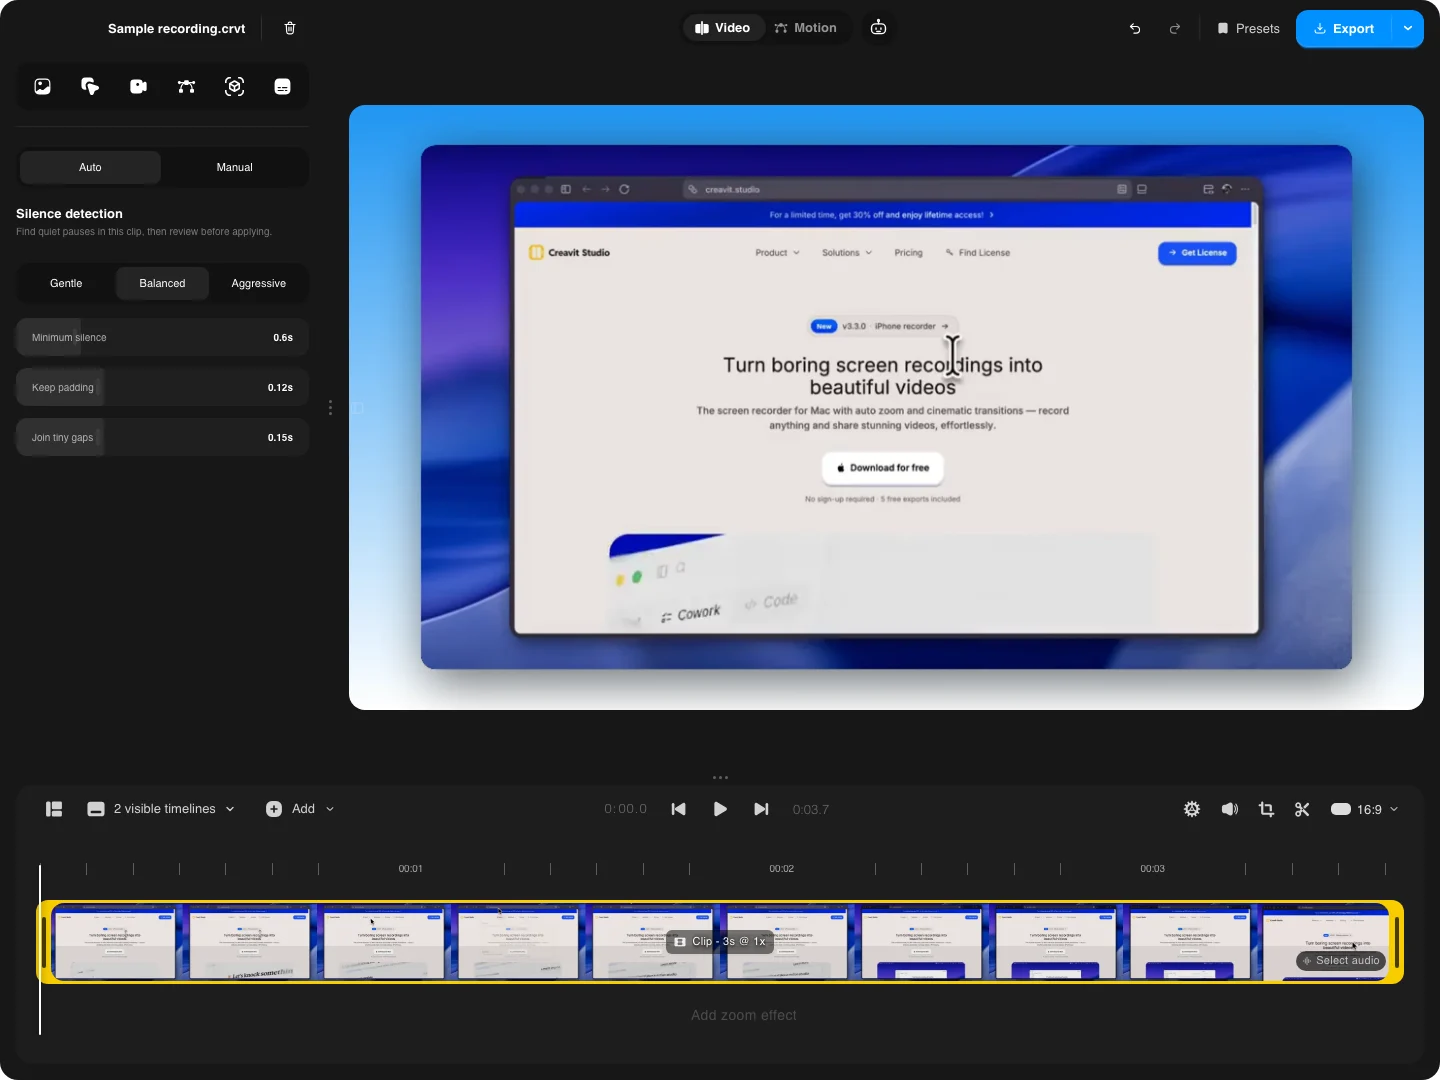
Open the clip's Edit Audio workflow and select Auto. Creavit Studio analyzes the waveform and presents quiet regions for review. Start with a sensitivity preset, then adjust the controls to suit the voice and the recording environment.
Understand the three timing controls
Minimum silence controls how long a quiet stretch must be before it becomes a candidate. If tiny gaps between words keep appearing, increase this instead of deleting them one by one. A deliberate pause between two sections may need different treatment from the breath inside a sentence.
Keep padding retains some space around a detected region. Leaving a little room helps prevent words from sounding clipped together. Listen to the consonants at each boundary: the picture can look correct even when an audio join feels abrupt.
Join tiny gaps changes how nearby candidate regions are grouped. Check the resulting selection when you adjust it; a larger combined selection can contain a small sound or action that you still want to keep.
There is no universal best setting. A quiet microphone recording, a noisy room, and a screen capture with loud application sounds produce different waveforms. Change one setting at a time, preview the proposed regions, and keep the decision tied to what you hear and see.
Review before applying
Preview each candidate and exclude the ones that should stay. Listen slightly before and after the selection as well as inside it. That is where you will notice a chopped syllable, a missing mouse action, or a visual jump that does not make sense.
When the selections are right, remove them together. In Creavit Studio, ripple deletion closes the resulting timeline gaps. Captions, zooms, layouts, and other timed content are reconciled with the edit, but you should still play through the joins before exporting.
If the detector does not find a pause you want to cut, switch to Manual. Drag across the waveform, adjust the selection edges, preview that exact range, and apply the edit. Manual selection is also useful when a quiet passage contains music or system sounds that stop it from registering as silence.
Choose between mute, split, and remove
These operations solve different problems. Choosing the right one is more useful than applying the most aggressive silence preset.
| Action | What changes | When to use it |
| Mute | Sound is removed from the selected range; time remains | An unwanted sound occurs while the on-screen action is still useful |
| Split | The selection boundaries become edit points | You want to inspect or adjust a section separately |
| Remove | The selected time is cut and the timeline gap closes | The viewer does not need the sound or the action in that interval |
For example, an accidental notification sound may be a reason to mute audio. If the notification also exposes information on screen, muting alone is not enough. Cut the interval, retake it, or use a timed blur overlay. The guide to hiding sensitive information in a screen recording covers that separate review.
Do not confuse silence removal with background-noise cleanup. Detecting low-volume regions does not isolate speech from every fan, hum, or keyboard sound. If the recording is difficult to understand throughout, improving the microphone setup or recording another take can be a better choice than cutting more aggressively.
Cut repeated explanations through the transcript
A waveform tells you where sound happens. A transcript helps you decide whether the words need to be there.
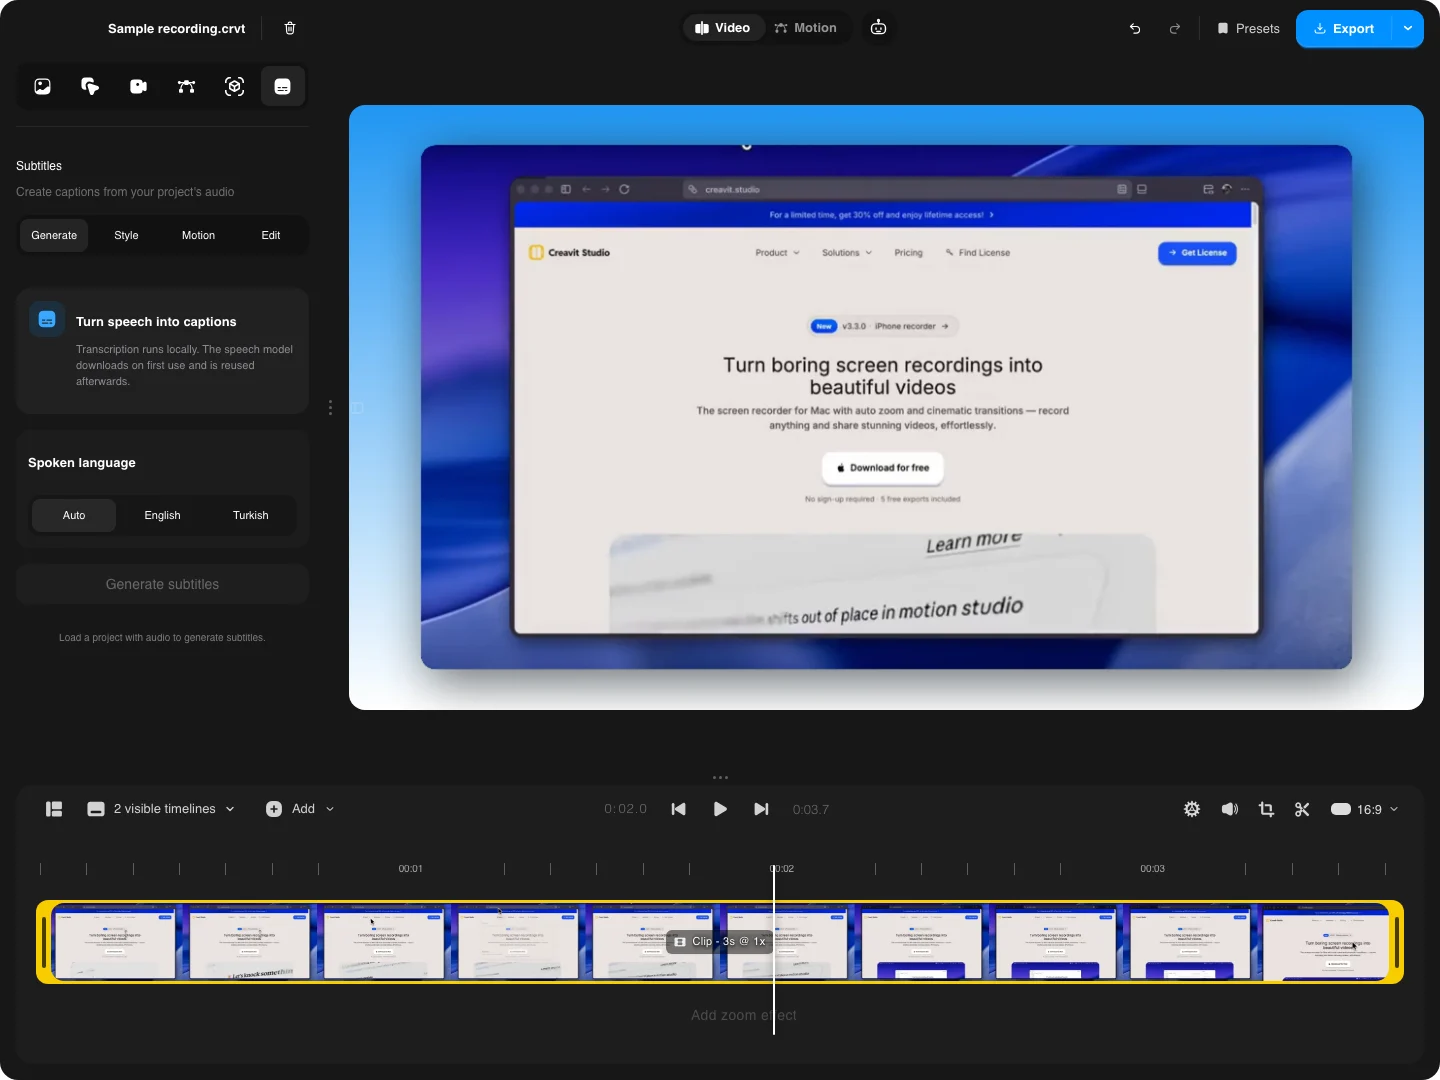
Generate subtitles from the project's speech, then open the editing workflow. In Creavit Studio, selecting text or a phrase exposes controls for the corresponding video range. You can preview, mute, split, or delete that section and refine the In and Out times before applying the change.
Use this for a repeated introduction, a sentence you restarted, or an explanation that no longer belongs in the final sequence. Read the remaining text as a paragraph. If the new sentence depends on an earlier phrase you deleted, bring the context back or choose a different cut.
For example, a take might contain: “Choose the weekly report. Actually, let me start with the monthly report. This is the one that shows the trend.” You can remove the false start, but only if the screen also shows the monthly report at the new join. A text edit should preserve the relationship between the narration and the visible action.
Silence detection and transcript editing work well together because they address different things. The first finds quiet intervals. The second lets you remove spoken material that is clear but unnecessary. Neither should be treated as a guarantee that every filler word or redundant sentence will be identified automatically.
Generate captions locally, then check them
Creavit Studio offers Fast, Balanced, and Accurate on-device Whisper models. Pick the balance of model size, speed, and transcription quality that fits the project. The model downloads once and is reused locally; choose the spoken language when automatic detection is not giving the expected result.
Names, acronyms, code identifiers, and product terminology need particular attention. A transcription model can produce a plausible word that is still the wrong label for your interface. Compare those terms to the controls on screen, and correct the text before you export.
After cuts, review both the wording and the timing. A caption should appear while the corresponding idea is being spoken, remain readable, and leave room for the part of the interface being demonstrated. Check line breaks at the final viewing size, not only in the large editor preview.
A silent video needs authored explanation. Automatic captions transcribe speech; they do not infer the purpose of an unspoken mouse movement. For a recording without narration, add concise text overlays or Motion Studio titles to explain the steps.
Add zoom and motion after the pacing is clear
Once the sequence works, make the important actions easier to see. Use automatic or manual zoom to focus on a small control, style the cursor so it is visible, and keep camera layouts away from the content people need to read.
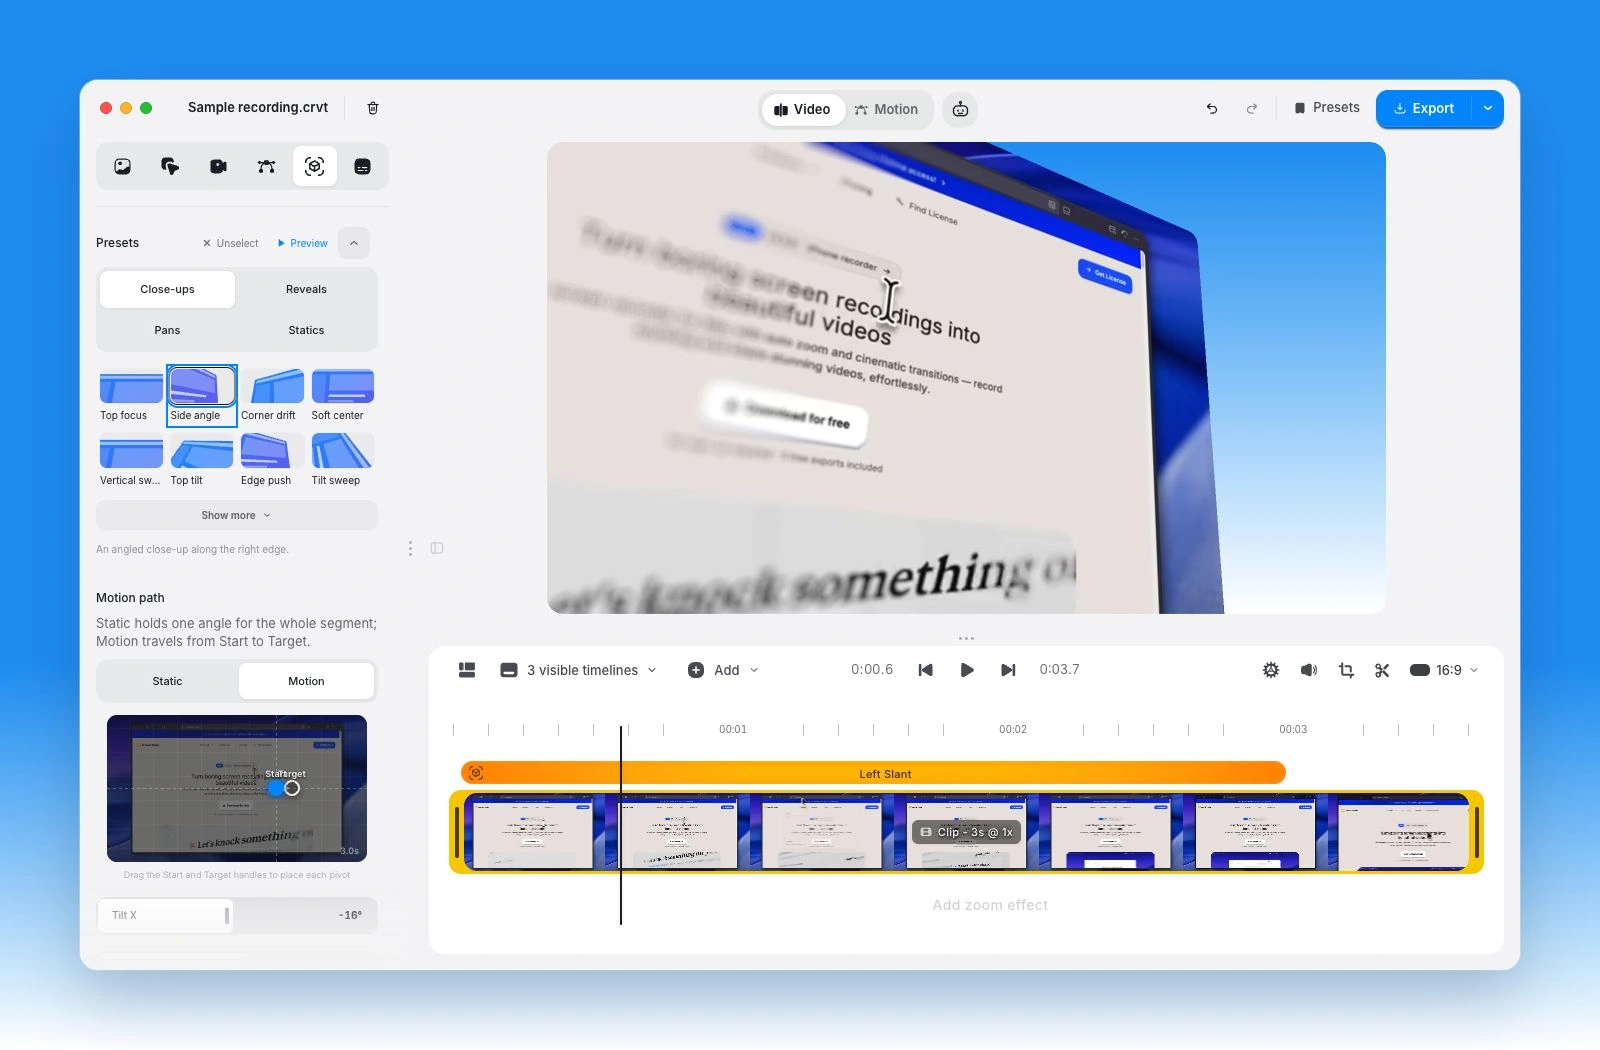
A Perspective move can introduce the product or emphasize a reveal. Return to a readable view while someone needs to inspect text or follow a sequence of clicks. Repeated camera moves can compete with the explanation when each action is already short.
Motion Studio is useful for a section title or a final next step. Reuse the same title style across related videos so the series feels consistent. Keep the wording brief enough to read before the next action begins.
For a release announcement, the product launch video workflow shows how to combine these tools into a short story. For the recording itself, start with the product demo recording guide.
Export for the place the video will live
Watch the complete edit once at normal speed, with audio, and once without relying on the narration. The first pass reveals awkward joins; the second shows whether the visual sequence and labels communicate enough on their own.
Choose a finished MP4 with a background for an ordinary video upload. Set the output size to suit the destination and inspect small text after export. An available 4K setting does not make blurry source text sharp, and a large canvas can still produce a hard-to-read demo if the important interface is too small inside it.
For a short silent loop, a GIF may be enough. For a clip that needs to sit over another design, choose transparent video export: ProRes 4444 MOV for compositing, WebM alpha for compatible web players, or GIF for simple hard-edged transparency. The receiving editor or player must support the selected format.
Keep the editable project in Base. You can organize recordings by project and return to the source when a product label changes. If you connect Google Drive, export uploads can go to your chosen folder while a local copy remains on the Mac. Uploading a file does not automatically make it public; check sharing separately when delivering it to someone else.
A final review before sharing
- The first few seconds make the purpose of the video clear.
- Cuts preserve the meaning of both the narration and the interface.
- Useful reading time remains after important results.
- No clipped words or sudden audio changes appear at the joins.
- Product names and interface labels are correct in the captions.
- Zooms, text, camera layouts, and motion still line up with the edited sequence.
- Private information has been removed or covered in the final file.
- The exported file plays correctly in its intended destination.
The improvement should be visible in the flow of the explanation. You do not need to remove every quiet second. Keep what helps someone understand the product and remove what only reflects the effort of recording it.
Common questions
Can I remove pauses from an existing screen recording?
Yes. Import the recording into Creavit Studio and use Edit Audio on the clip. Silence detection needs an audio waveform to analyze. For a silent capture, inspect the visual sequence and trim unneeded time manually.
Does muting a pause make the video shorter?
No. Muting changes the audio while retaining the time. Remove the selected range when you want to shorten the recording and close the gap.
Will silence removal automatically remove filler words?
Silence detection finds quiet regions, not the meaning of spoken words. Use the transcript to review an unwanted phrase and edit its matching video range. Check the new join so the sentence and the screen action still make sense.
Do captions require a cloud upload?
Creavit Studio's subtitle workflow uses downloaded Whisper models on the Mac. The model is downloaded once, then reused locally. This is separate from optional Google Drive uploads or any external AI provider you choose to connect.
Keep building your recording workflow
Continue with how to create better product demo videos, how automatic zoom works, or how to hide sensitive information.
Ready to edit a take? Download Creavit Studio and try the workflow with your own recording. You can also compare the available plans before choosing a license.