The Short Answer
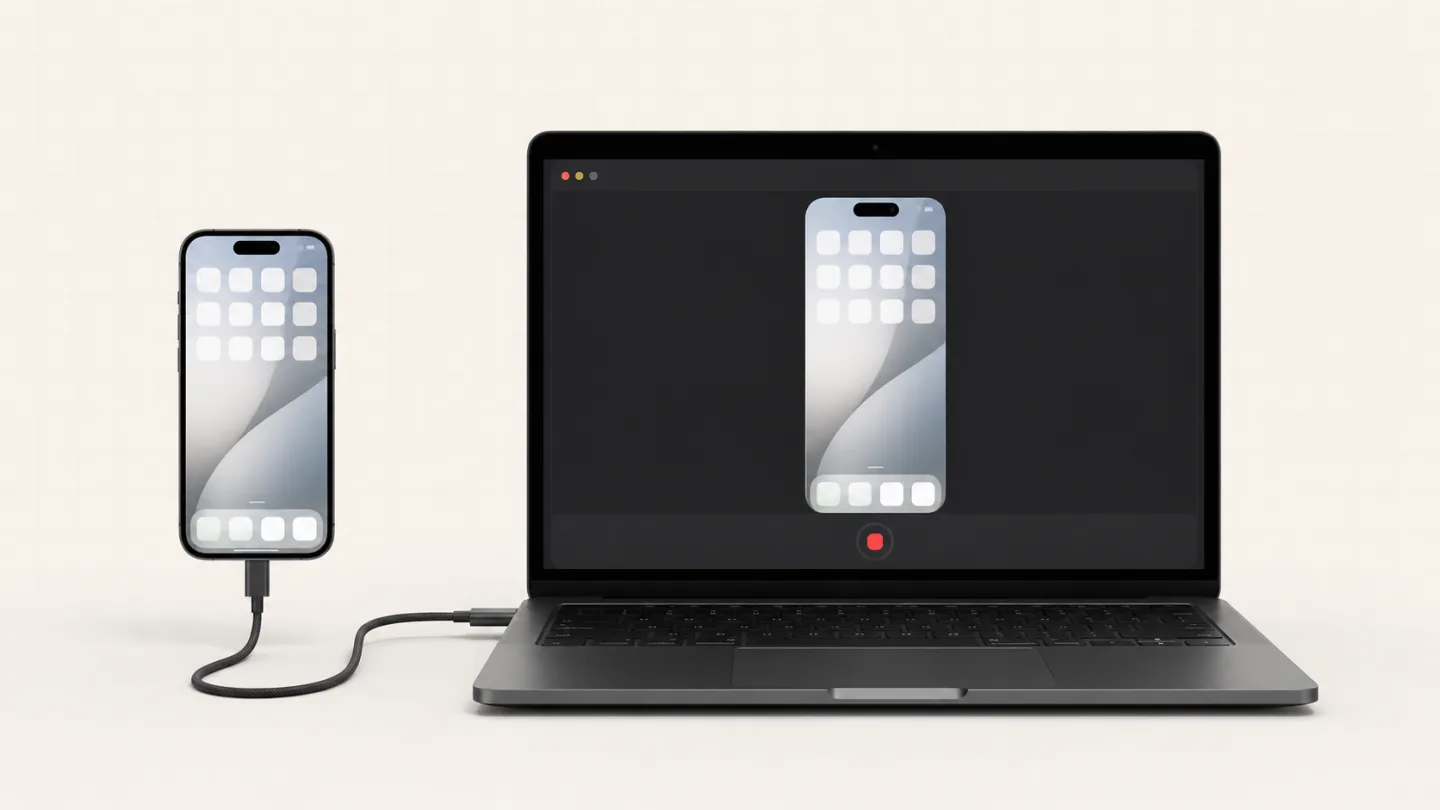
Open Creavit Studio, connect the iPhone to your Mac with a data-capable USB cable, unlock it, tap Trust, and choose iPhone on the recorder screen. Start recording and use the phone normally. The phone's own audio is captured with the video, while the Mac camera and microphone can remain part of the recording when you need narration or a presenter layer.
When you stop, the capture opens directly in Creavit Studio's editor, ready for trimming, 2D or 3D iPhone mockups, Perspective moves, Zoom Motion, backgrounds, camera layouts, overlays, subtitles, and export. There is no separate phone app, AirPlay session, cloud upload, or import step.
The cable matters. A charging-only cable can power the phone without making it available as a capture source.
What You Need
- A Mac with an available USB or USB-C port
- An unlocked iPhone
- A cable that supports data and charging
- Enough free Mac storage for the recording
- Permission to connect the accessory and trust the computer when prompted
When you connect the phone for the first time, macOS may ask whether to allow the accessory. Click Allow. The iPhone may then show Trust This Computer? Tap Trust and enter the iPhone passcode.
Apple documents the same connection flow in its guide to connecting an iPhone to a computer. Do not continue until the iPhone also appears in the Finder sidebar; that is the quickest check that the Mac can see it.
Why Record the iPhone Directly in Creavit Studio?
The useful difference is not merely getting the iPhone pixels onto the Mac. It is what happens immediately after you stop:
- The iPhone capture is already on an editable timeline
- You can trim mistakes and waiting time without moving to another app
- The screen can sit inside a flat or real 3D iPhone body
- Background, padding, radius, shadow, zoom, and perspective remain editable
- Camera, text, image, GIF, and video overlays can share the same composition
- The project can be reframed for a landscape tutorial or a vertical social clip
That makes the workflow suited to app demos, onboarding videos, product launches, tutorials, App Store marketing, and social content. For a one-off unedited diagnostic clip, QuickTime Player remains a useful built-in alternative; for a video people will watch, direct capture and editing in one project avoids an import-and-rebuild step.
How to Record an iPhone in Creavit Studio
Creavit Studio treats a USB-connected iPhone as a recording source. The capture opens in the same editor used for Mac screen recordings, so the iPhone footage can move directly into a device mockup and a finished composition.
1. Connect and unlock the iPhone
Connect the iPhone to the Mac with a data-capable cable. Keep the phone unlocked for the first connection and accept the Allow and Trust prompts if they appear.
2. Choose iPhone as the recording source
Open Creavit Studio and choose iPhone on the recorder screen. If no device is listed, leave the phone connected, unlock it again, and confirm that Finder can see it before retrying.
3. Prepare the phone before recording
Set the orientation you want before the take. Turn on Do Not Disturb or another Focus mode, close private conversations, and move any sensitive app off screen. A notification that appears for half a second is still part of the video.
Also decide whether the video should show taps through narration, a pointer added later, or simply the interface itself. iOS does not draw a visible touch indicator into an ordinary screen feed.
4. Start the recording
Begin capture in Creavit Studio, then perform the workflow on the iPhone at a deliberate pace. Pause briefly after opening a new screen so viewers have time to understand what changed.
For a product demo, record a clean route through the app rather than exploring live. A short list of actions beside the Mac helps:
- Start from a known screen
- Show one task from beginning to end
- Avoid repeated taps and backtracking
- Leave one second of stillness before the first action and after the last
5. Edit and frame the result
After recording, use the timeline to trim setup time and mistakes. iPhone recordings can be presented with a flat frame or a 3D device mockup, then combined with a background, shadow, zoom, perspective motion, text, media overlays, or a camera layer.
Keep the motion purposeful. A gentle zoom can make a small control readable; a large zoom on every tap makes the phone feel unstable. For vertical footage, choose the delivery aspect ratio before doing detailed positioning so you do not have to reframe every element later.
6. Export and watch the file once
Export at the resolution and frame rate required by the destination. Then watch the exported file from beginning to end with sound on. This catches orientation changes, hidden notifications, silent audio, and framing problems that are easy to miss while editing.
Download Creavit Studio for Mac ->
Put the Recording in a 2D or 3D iPhone Mockup
Raw portrait footage often looks like a tall rectangle floating in the middle of a landscape video. An iPhone mockup gives the screen physical context and makes an app demo immediately recognizable.
Creavit Studio offers two presentation styles:
Use a 2D iPhone frame for a clean interface demo
A flat frame keeps the composition simple and puts almost all attention on the app. It works well for documentation, support tutorials, feature walkthroughs, and any video where the interface must stay easy to read.
Choose the iPhone generation and model that fits the recording, then set the background, padding, corner treatment, and shadow around it. A restrained shadow separates a dark phone from a dark canvas without making the mockup look like a sticker.
Use a real 3D iPhone model for a product video
Switch to 3D when the device itself is part of the visual story. The iPhone screen recording is mapped onto the model as a live texture, so the screen remains attached to the glass as the phone rotates, catches light, and changes angle.
The catalog covers iPhone generations from iPhone 11 through iPhone 17, including Pro, Pro Max, Plus, mini, Air, and e variants where they belong. Favorite the models you use most often so they stay near the top of the selector.
3D works best in short, deliberate moments: an opening reveal, a transition between chapters, or a closing product shot. For the section where viewers need to read small labels, return to a calmer angle or a flat frame.
Add Perspective to the iPhone Screen Recording
Perspective is a timeline segment, not a destructive transform baked into the source. Add a Perspective range where you want the iPhone to tilt, rotate, lift, or settle, then adjust its transform, material, origin, and transition controls while the original recording stays editable.
The iPhone mockup remains with the video through the 3D move instead of flattening into a rectangle. The device body, live screen texture, camera overlay, and other canvas layers keep their intended order through preview and export.
Use the origin control to decide what the move pivots around. A centered origin produces a balanced product turn. Moving the origin toward a corner creates a more directional entrance. The control extends beyond the video itself, so the motion can be composed around the whole canvas rather than being trapped inside the phone screen.
A practical Perspective sequence for an app demo is:
- Start with a slight three-quarter phone angle for the opening.
- Ease toward a front-facing view before the first detailed interaction.
- Keep the phone stable while the viewer follows the workflow.
- Add a second Perspective segment for the closing reveal or call to action.
This protects readability. Continuous 3D movement may look impressive for two seconds, but it becomes tiring behind a minute of taps and labels.
Use Zoom Motion to Guide Attention Across the iPhone UI
The new manual zoom workflow has Static and Motion modes.
Static Zoom holds one origin. Use it when a single control, form, chart, or panel needs to remain large for the whole segment.
Zoom Motion travels from a Start point to a Target point. Use it when the action moves across the phone — for example, from a navigation button at the bottom to a confirmation state near the top.
Each point can have its own zoom level. That means the move can begin with a wider view, travel toward the target, and finish closer without stacking separate zoom segments. If a point does not have its own scale, it inherits the shared Zoom level, which keeps simple moves quick to set up.
Motion duration is separate from the full zoom segment. A two-second Zoom Motion can finish its travel early and remain settled on the target while the segment continues. This is useful when the UI changes quickly but the narration needs a few more seconds on the result.
The position pad also reaches beyond the video bounds. You can move the iPhone partly or completely outside the canvas, leave intentional negative space for a title or presenter, and then bring the phone back into view. That is especially useful when turning portrait footage into a 16:9 product video.
Use one shared transition system to shape the zoom-in, motion, and zoom-out. Natural, ease-in, ease-out, smooth, balanced, linear, and custom curves let the zoom match the pace of the video. A custom cursor scales with the active zoom, so it remains visually attached to the magnified interface instead of shrinking as the picture grows.
For an iPhone app demo, a good rule is one zoom for one idea. Let the move finish, keep the target still long enough to read, and avoid starting a second move before the first one has visually resolved.
Combine the iPhone with Camera, Audio, and Overlays
Direct iPhone capture does not turn the rest of the recorder off. You can record your camera and microphone while the phone's own audio comes through with the device feed.
That opens several useful layouts:
- A small presenter bubble over a full iPhone composition
- A full-camera background with the iPhone placed in front
- A side-by-side tutorial with the presenter explaining each step
- A product launch layout with titles, logo, screenshots, or supporting video
Keep the camera away from the controls being demonstrated, and check its layer position after adding a 3D mockup or Perspective segment. If the presenter is the introduction, let the camera lead first and then reduce it when the detailed phone workflow begins.
Images, GIFs, videos, text, subtitles, and privacy masks can sit on the same timeline. Use them to clarify the recording, not to decorate every empty area. The phone screen is already visually dense; one title and one clear callout usually communicate more than five moving overlays.
Can You Use QuickTime Instead?
Yes. If you only need a plain file, connect the iPhone, open QuickTime Player, choose File > New Movie Recording, and select the iPhone under Camera in the menu beside the Record button. Apple's current QuickTime Player guide documents this built-in route.
QuickTime is useful for a fast bug report or archive copy, but its editing is limited. Choose Creavit Studio when the iPhone recording needs a device frame, designed canvas, zoom, perspective motion, camera layer, overlays, or a reusable editing project.
How to Record iPhone Audio on a Mac
Audio is the part most likely to surprise you, so separate the three things people call “iPhone audio”:
- App or game sound coming from the iPhone
- Your voice recorded through the Mac, iPhone, or another microphone
- Protected media from a streaming, call, or rights-managed app
Select the intended microphone or device input before recording and test it. If an app deliberately protects its video or audio, the recording may be silent or black. That is not a cable fault, and a different recorder should not be treated as a way around the restriction.
For spoken tutorials, a dedicated Mac microphone often sounds cleaner and is easier to monitor. For a pure app demo, record the device feed first and add narration in a controlled environment afterward if your workflow allows it.
If the iPhone Does Not Appear
Work through these checks in order:
- Unlock the iPhone. A locked device may not complete the connection.
- Accept both prompts. Click Allow on the Mac and Trust on the iPhone, then enter the iPhone passcode.
- Check Finder. If Finder cannot see the phone, QuickTime and Creavit Studio will not see it either.
- Try another cable. The cable must support data, not only charging.
- Try another port or adapter. Hubs and low-quality adapters are common failure points.
- Disconnect and reconnect. Quit QuickTime or return to the Creavit recorder first, then reconnect the phone.
- Restart both devices. This clears a capture session that did not close correctly.
- Update macOS and iOS. Connection fixes often arrive through system updates.
Apple's support page for an iPhone or iPad that is not recognized recommends the same core checks: verify the USB connection, use a data-capable cable, try another port, and keep macOS and iOS current.
If you tapped Don't Trust by mistake and the prompt no longer appears, go to Settings > General > Transfer or Reset iPhone > Reset > Reset Location & Privacy on the iPhone. Reconnect it and respond to the trust prompt again. This resets privacy decisions, not the contents of the phone.
Common Recording Problems
The preview is black
First test the Home Screen or Settings. If those appear but one app does not, the app may protect its content. Streaming video, some calls, and rights-managed material can intentionally produce a black frame.
If everything is black, reconnect the phone, unlock it, and select it again as the source.
The recording has no sound
Open the source menu and confirm the intended microphone or device input. Make a short test outside the protected app. Also check that the iPhone is not routing audio to Bluetooth headphones you did not intend to use.
The video rotates during the take
Choose portrait or landscape before recording and turn on Orientation Lock when the workflow does not require rotation. If rotation is part of the demo, pause before and after turning the phone so the transition can be edited cleanly.
The recording file is enormous
In QuickTime, use High instead of Maximum unless you specifically need the larger master. In an editor, export the delivery copy with an efficient codec and keep the original project only when you expect to revise it.
Notifications reveal private information
Use Focus mode before recording, and still watch the final export. Focus reduces interruptions; it does not replace a privacy review.
A Better Workflow for App Demos
Capturing the phone is only the first half of a good demo. The editing choices determine whether viewers can follow it.
Frame the device, not just the pixels. A phone frame gives the footage scale and makes portrait video feel intentional on a landscape canvas.
Use one background with strong contrast. Busy gradients and wallpapers compete with a small interface. A quiet background makes the phone screen easier to read.
Zoom only when the UI needs it. If a label is already readable, keep the frame steady. Use zoom to solve a clarity problem, not to prove that motion is available.
Cut waiting, not comprehension. Remove loading time and mistakes, but leave enough time after each tap for the viewer to register the result.
Design for the destination. A 9:16 social clip, a 16:9 YouTube tutorial, and a product-page embed need different phone scale and caption placement. Choose the canvas before polishing.
For a complete structure, use the planning steps in How to Create Better Product Demo Videos on Mac.
Frequently Asked Questions
Can I record my iPhone screen on a Mac without a cable?
The dependable live-capture method is wired. Without a cable, you can use the iPhone's built-in screen recorder and then transfer the finished file to the Mac with AirDrop. That is useful when you only need the footage later, but it is not the same as monitoring and recording the iPhone live on the Mac.
Is QuickTime free for recording an iPhone?
Yes. QuickTime Player is included with macOS and can capture the screen of a connected iPhone as a movie.
Why should I choose New Movie Recording instead of New Screen Recording?
New Screen Recording captures the Mac display. New Movie Recording exposes connected capture devices, including an iPhone, through the Camera menu.
Can QuickTime record taps or touch indicators?
It records the pixels shown by the iPhone. iOS does not add visible tap circles to the normal screen feed, so touch emphasis must be explained through narration or added during editing.
Can I record an iPhone call or streaming app?
Some apps block capture or omit audio, and recording conversations can require consent depending on where you are. Respect the app's restrictions and the privacy of everyone involved.
Does recording reduce the iPhone's screen quality?
The Mac receives a video feed from the connected device. The final quality depends on the capture setting and later export. Use a short test to check small text and motion before recording the full workflow.
Related Reading
- iPhone Screen Recorder for Mac — the feature page for iPhone capture, device mockups, and the hand mockup
- How to Screen Record on Mac — the equivalent workflow for your Mac display
- How to Create Product Demo Videos on Mac — structure, pacing, and editing for product walkthroughs
- Screen Recording for Social Media Content — aspect ratios and short-form delivery
- How to Hide Sensitive Information in a Screen Recording — privacy checks before publishing